How To Write a Great Instagram Bio as a Creator
For content creators and influencers, Instagram has replaced business cards. Gone are the days of walking around an event and passing out a physical paper card with your title and email address on it—instead you ask, “what’s your Instagram handle?” without a second thought.
Making a great first impression on Instagram is key. Developing a visual brand identity on Instagram is important, and so is crafting the perfect Instagram bio.
Today we’re going to break down the ultimate Instagram bio line by line if you are a creator so that you can attract your dream audience and get paid to create.
Instagram is the top social media platform where I am directly connected and engaging with the majority of my audience.
I may have a larger following on platforms like Pinterest and TikTok, but in terms of comments, direct messaging, and how you can share and save and interact with your audience, to me Instagram is the most “social” social media platform.
I know how tricky it can be to get your Instagram bio right (and you may very well end up updating it over time as your content evolves) so let’s walk through each component of the Instagram bio piece by piece.
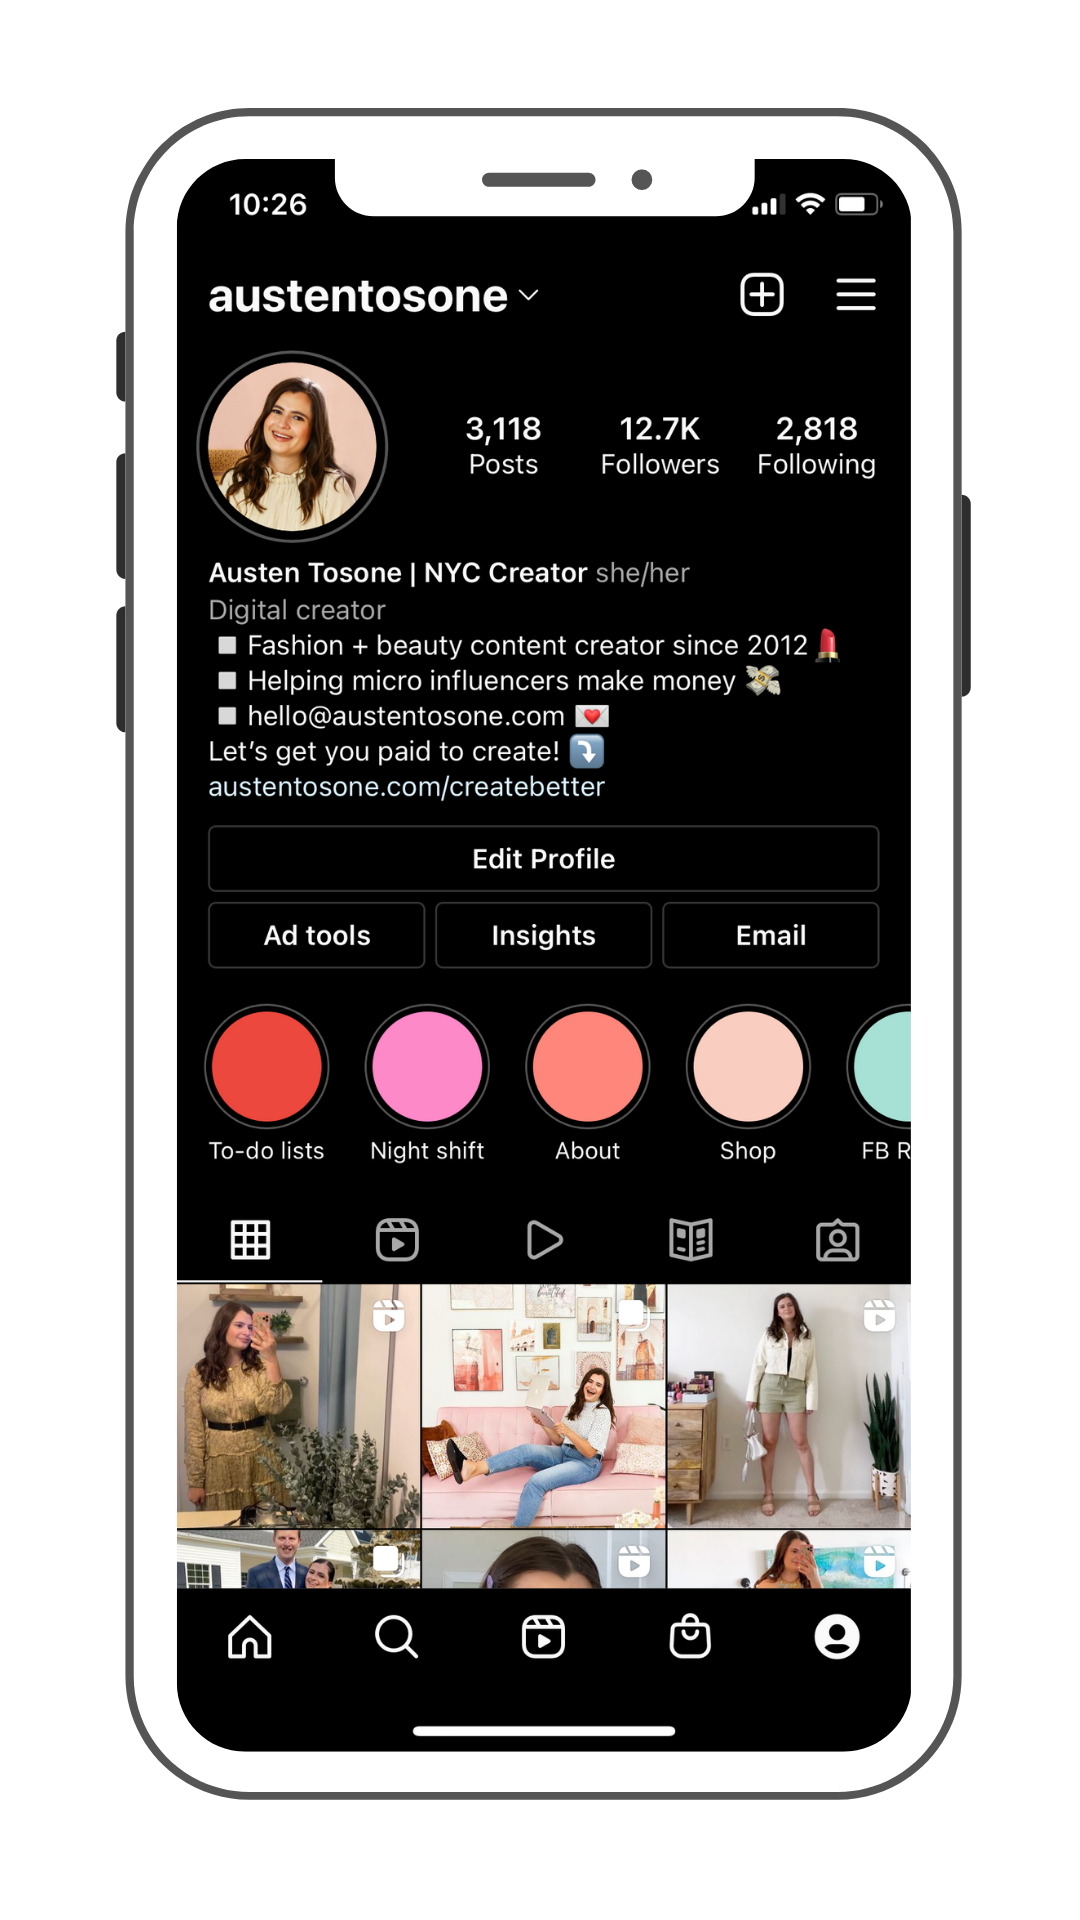
Your username (aka your handle)
For creators I always recommend that whenever possible you make your handle either your name or the name of your blog or business that you may run so that it’s easy for other people to find you on the app.
If you can’t get your exact handle (ex: @ashleysmith) because you have a common name, think about adding an extra word or phrase to the end of your handle, rather than the beginning.
For example, if @ashleysmith is unavailable maybe try @ashleysmithnyc or @ashleysmithblog instead of @byashleysmith or @theashleysmithblog simply because people will have a tendency to search by your name first and having those letters at the beginning of your username increases the chances that it will populate in search.
Your name field
The name field may be the most underutilized part of an Instagram bio. Your name field is where if you go to tap “edit” on your Instagram profile, you’ll see a space to put your name.
So if for example, you decide to go by your blog name for your handle and your username is @beachybabe you could still list Ashley Smith in the name field which is searchable, just like your handle.
Instagram has very limited search capabilities unlike other platforms, so this is one of the best ways you can get found easily when people type your name into the search bar.
Your name field is also a great place to share your location. Many PR agencies and influencer marketing managers will use Instagram to cast influencers and if they search “NYC blogger” or “Chicago creator” and those phrases are in your name field, you can pop up.
If you're a content creator who wants to work with local brands or get involved to events in your community, having your location in your bio is key. If you’re not comfortable sharing your exact city or town, even putting your state or region is helpful.
Pronouns
You can now add pronouns to your Instagram bio, which I think is an awesome update.
Even though I am a cisgendered, straight female who identifies as a woman, I like adding my pronouns when I can on social media profiles for two reasons.
Reason one is because I have a gender neutral name and I’ve been misgendered in the past, which I don’t take personally whatsoever but if I can limit the amount of emails in my inbox that start “dear sir,” I’ll do it.
Secondly, I like showing my support for anyone who may choose to use pronouns other than the ones they were assigned, for lack of a better word.
Everyone sharing their pronouns normalizes it for people who may choose to go by pronouns that don’t reflect their gender or how they want to identify. In short, it’s a nice gesture of solidarity.
Category tag
You used to set your category tag through Facebook, but Instagram has evolved and you can now set your category directly on your Instagram "Edit Profile" settings and select a category that best describes your account.
I had “blogger” as my category for several years but since I do YouTube, TikTok and Instagram in addition to my blog, I’ve found that digital creator is kind of the term that I like to use to describe what I do.
Luckily, this category tag does not take away from the character space that you're allotted in your Instagram bio, which is only 150 characters (30 characters for name field). It's really not a lot to work with but the ability to add a category tag is like a tiny gift from Instagram.
Make an impression
Your Instagram bio should tell your future community members what your account is all about so that they’ll know what to expect should they choose to follow you.
Main bio
I come across a lot of creator bios on a day to day basis and if I were to give line by line recommendations, here’s what I’d suggest adding:
First line: expand on your title or niche
My current first line: Fashion and beauty content creator since 2012
Why I like it: it gets specific about what type of content I create and shows authority by naming the year I started
Second line: the “I help” line
My current help line: Helping micro-influencers make money
Why I like it: It shows people why they might get value out of following me. If you’re a mom and a professional organizer, maybe your “I help” line could be “Helping busy moms stay organized and sane.”
Third line: your email address
Why to include this: The email button on your Instagram profile is only available on mobile and many brands recruit influencers on their desktops.
Since there is no email button on the desktop version of Instagram, it’s important to include your email written out in your bio to make it easier for brands to reach out to you if they’re interested. It sucks that it eats up space, but it really is important if you want to work with brands.
Fourth line: Call to action for your link in bio
My current CTA: Let’s get you paid to create!
Why I like this: assuming my target audience has found my profile, this gives them instant access to many of my resources for creators beyond just Instagram.
Link in bio
I like to think of my link in bio almost like a table of contents.
If your Instagram profile was a magazine and people wanted to know more about you and what you create, and where to find things, they could almost go to this table of contents, so to speak, and see a list of other links of places where they can choose to go depending on what they're most interested in.
How do you create a link in bio page? Some people use third party platforms like Linktree or Milkshake, but I prefer to host this page on my own website for two reasons.
The first reason is that if there’s ever an issue or the link is down, I can address it right away and I’m not relying on someone else to fix it for me.
The second reason is additional traffic to my own website! That traffic is precious and you can continue to grow your page views while directing people to what they really want to see.
So I have a page on my Squarespace site that is unlisted, meaning that someone browsing my site on desktop wouldn’t accidentally click on it out of context and they’d have to type in the direct URL to land on that page, and it simply has a bunch of buttons directing people to different resources I offer.
If you need some ideas of what to include in your link in bio I list things like The Influencer Launchpad (my free guide for new content creators) my YouTube channel, my membership community, my LTK profile to shop my fashion, beauty and lifestyle favorites and more.
Instagram highlights
The last thing to mention is your Instagram story highlights. I know, I know, they’re not technically part of your bio…but they’re still very important and contribute to the overall first impression that you can make.
This is a great place to showcase your best Instagram story content for potential brand partners.
Remember, stories disappear after 24 hours but if a brand wants to cast you for an Instagram stories campaign and you have your best work saved to a highlight, that makes it easy for them to share that content with the powers that be and cast you!
I have highlights to showcase content I’ve created like beauty tips and trips I’ve taken and then I also have a highlight called about where I introduce myself and also press where I can share podcasts I’ve been on or articles I’ve been featured in.
I hope you found this blog post helpful! Do you have any lines in your bio that you love or tips for fellow creators? Leave a comment down below!
yours,
Austen
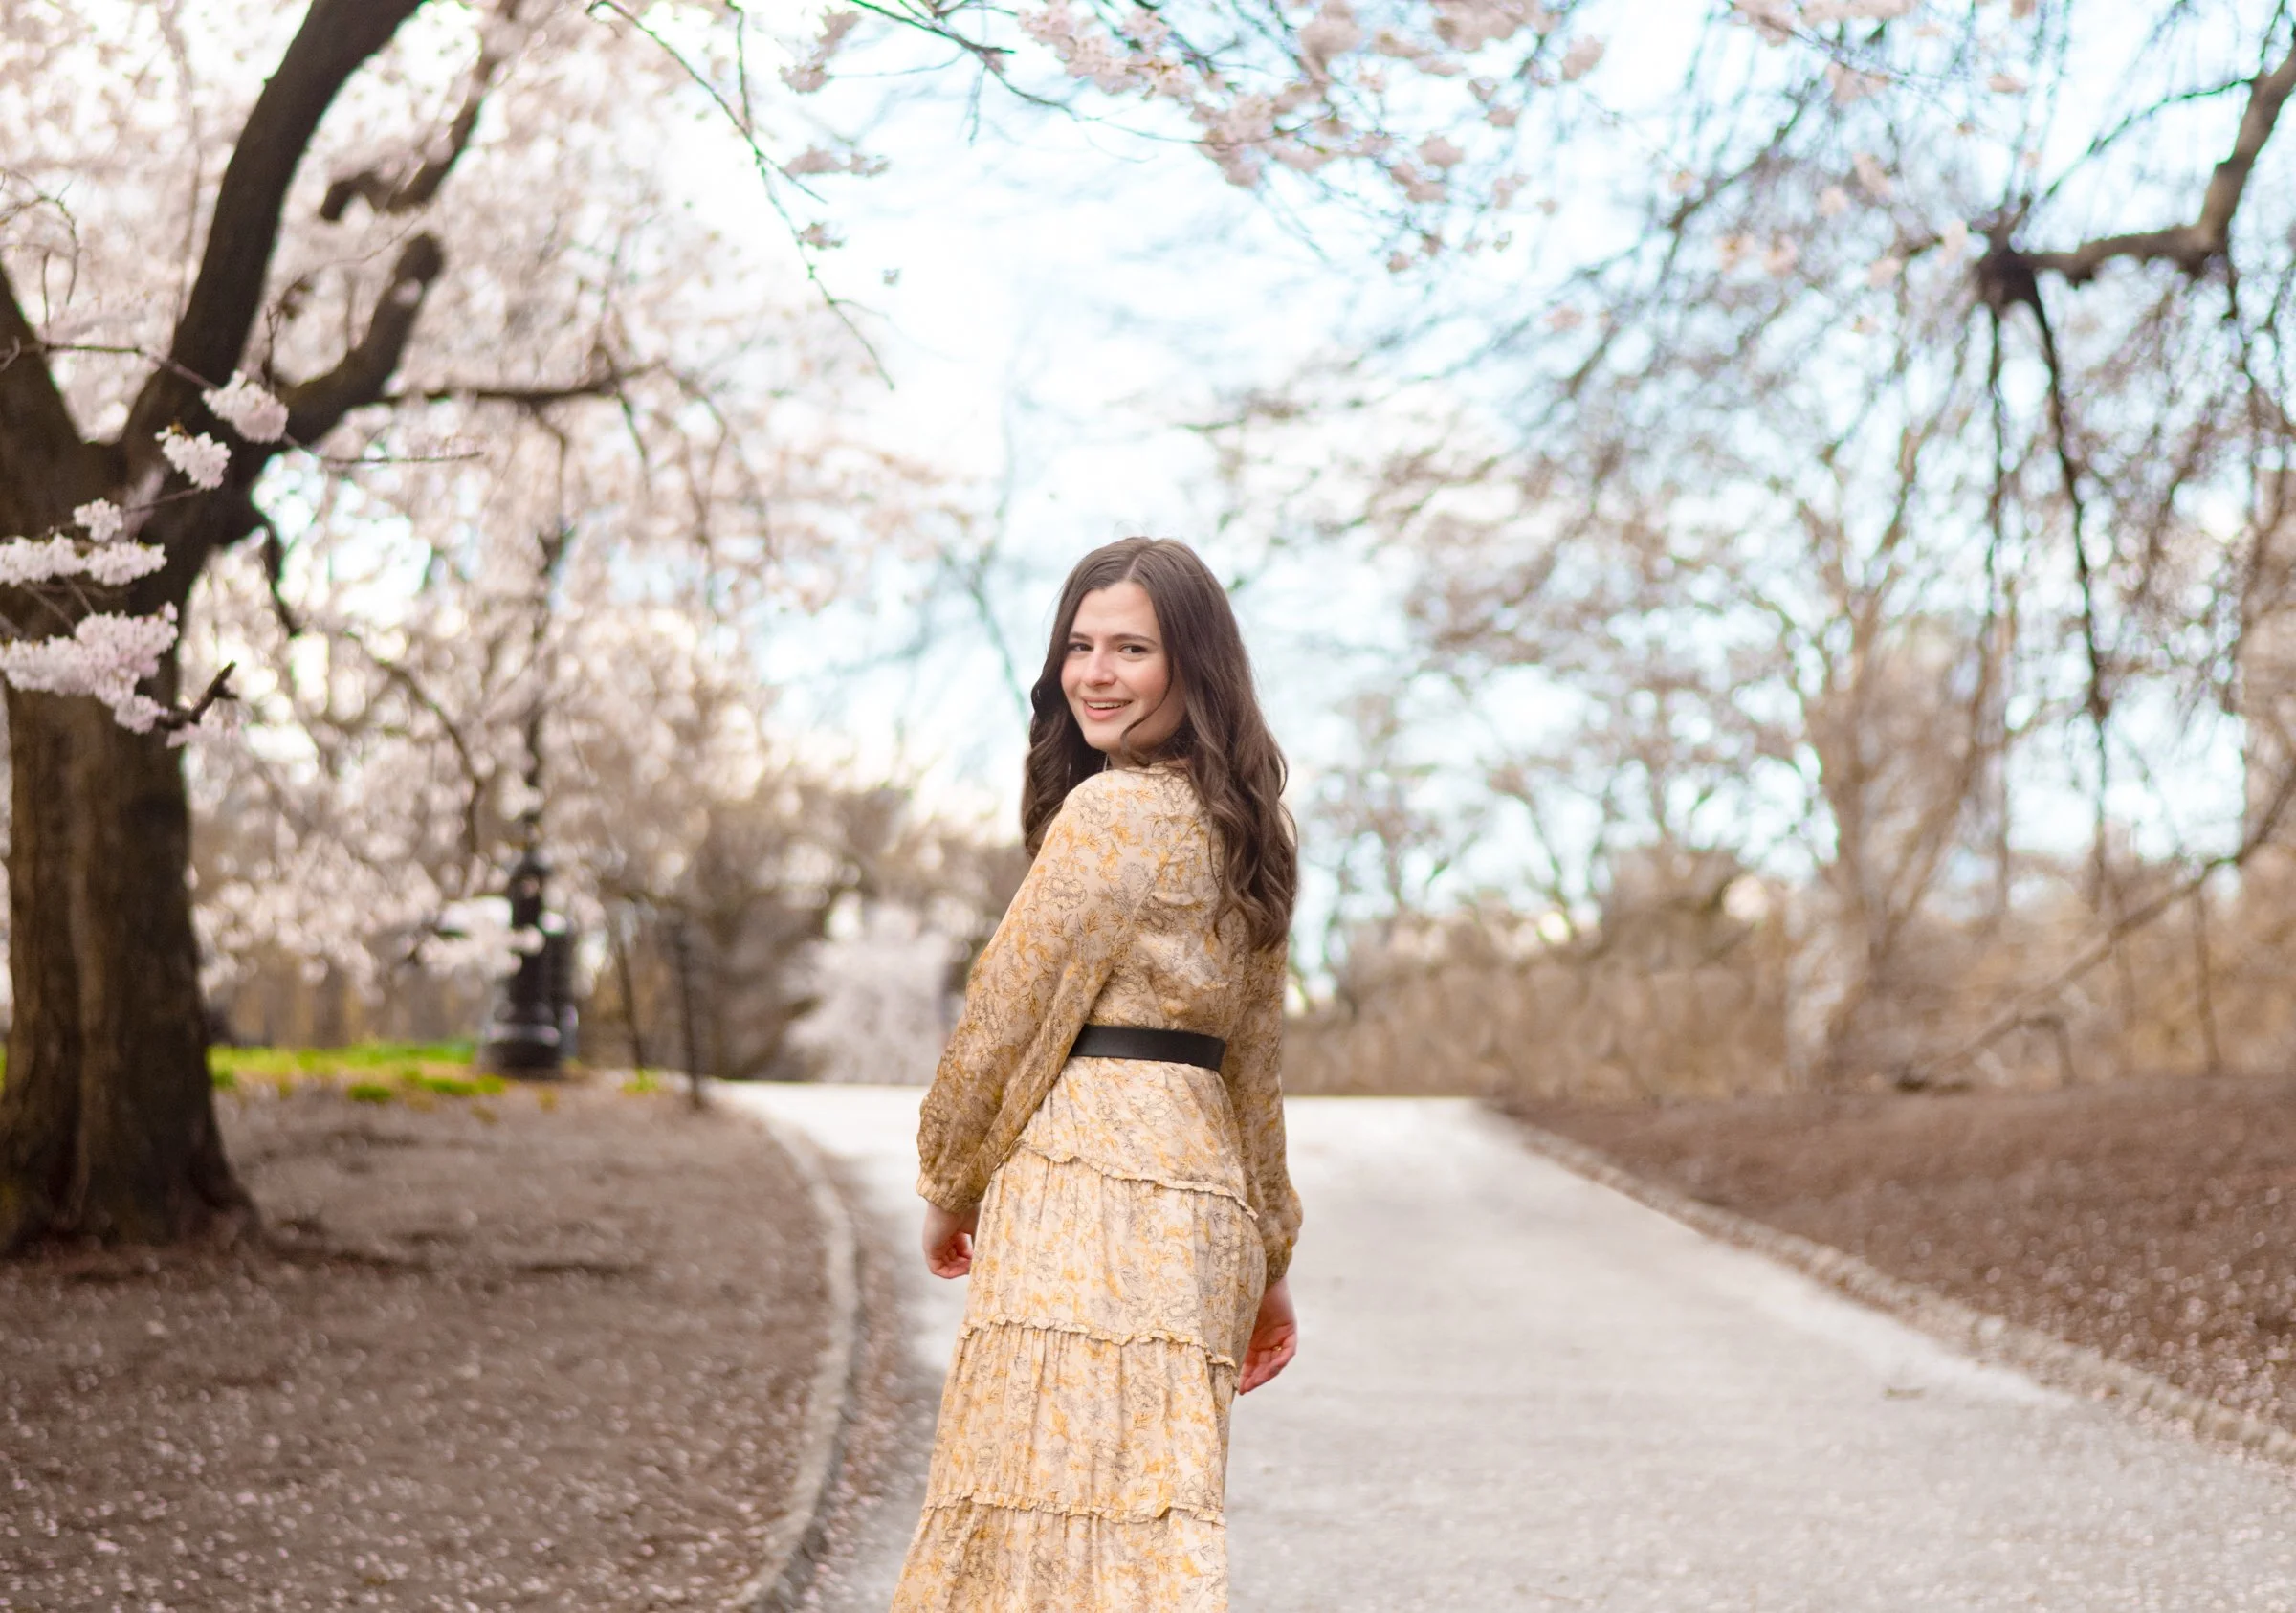
Photo above by Karya Schanilec