
Tezza Dream Kit Review and Room Transformation

“The answer is still no,” my mom said as I tried to bring up painting my childhood bedroom by myself for the third time. When I came home to quarantine with my mom I had no idea how long I’d actually be staying here and what our day-to-day would consist of.
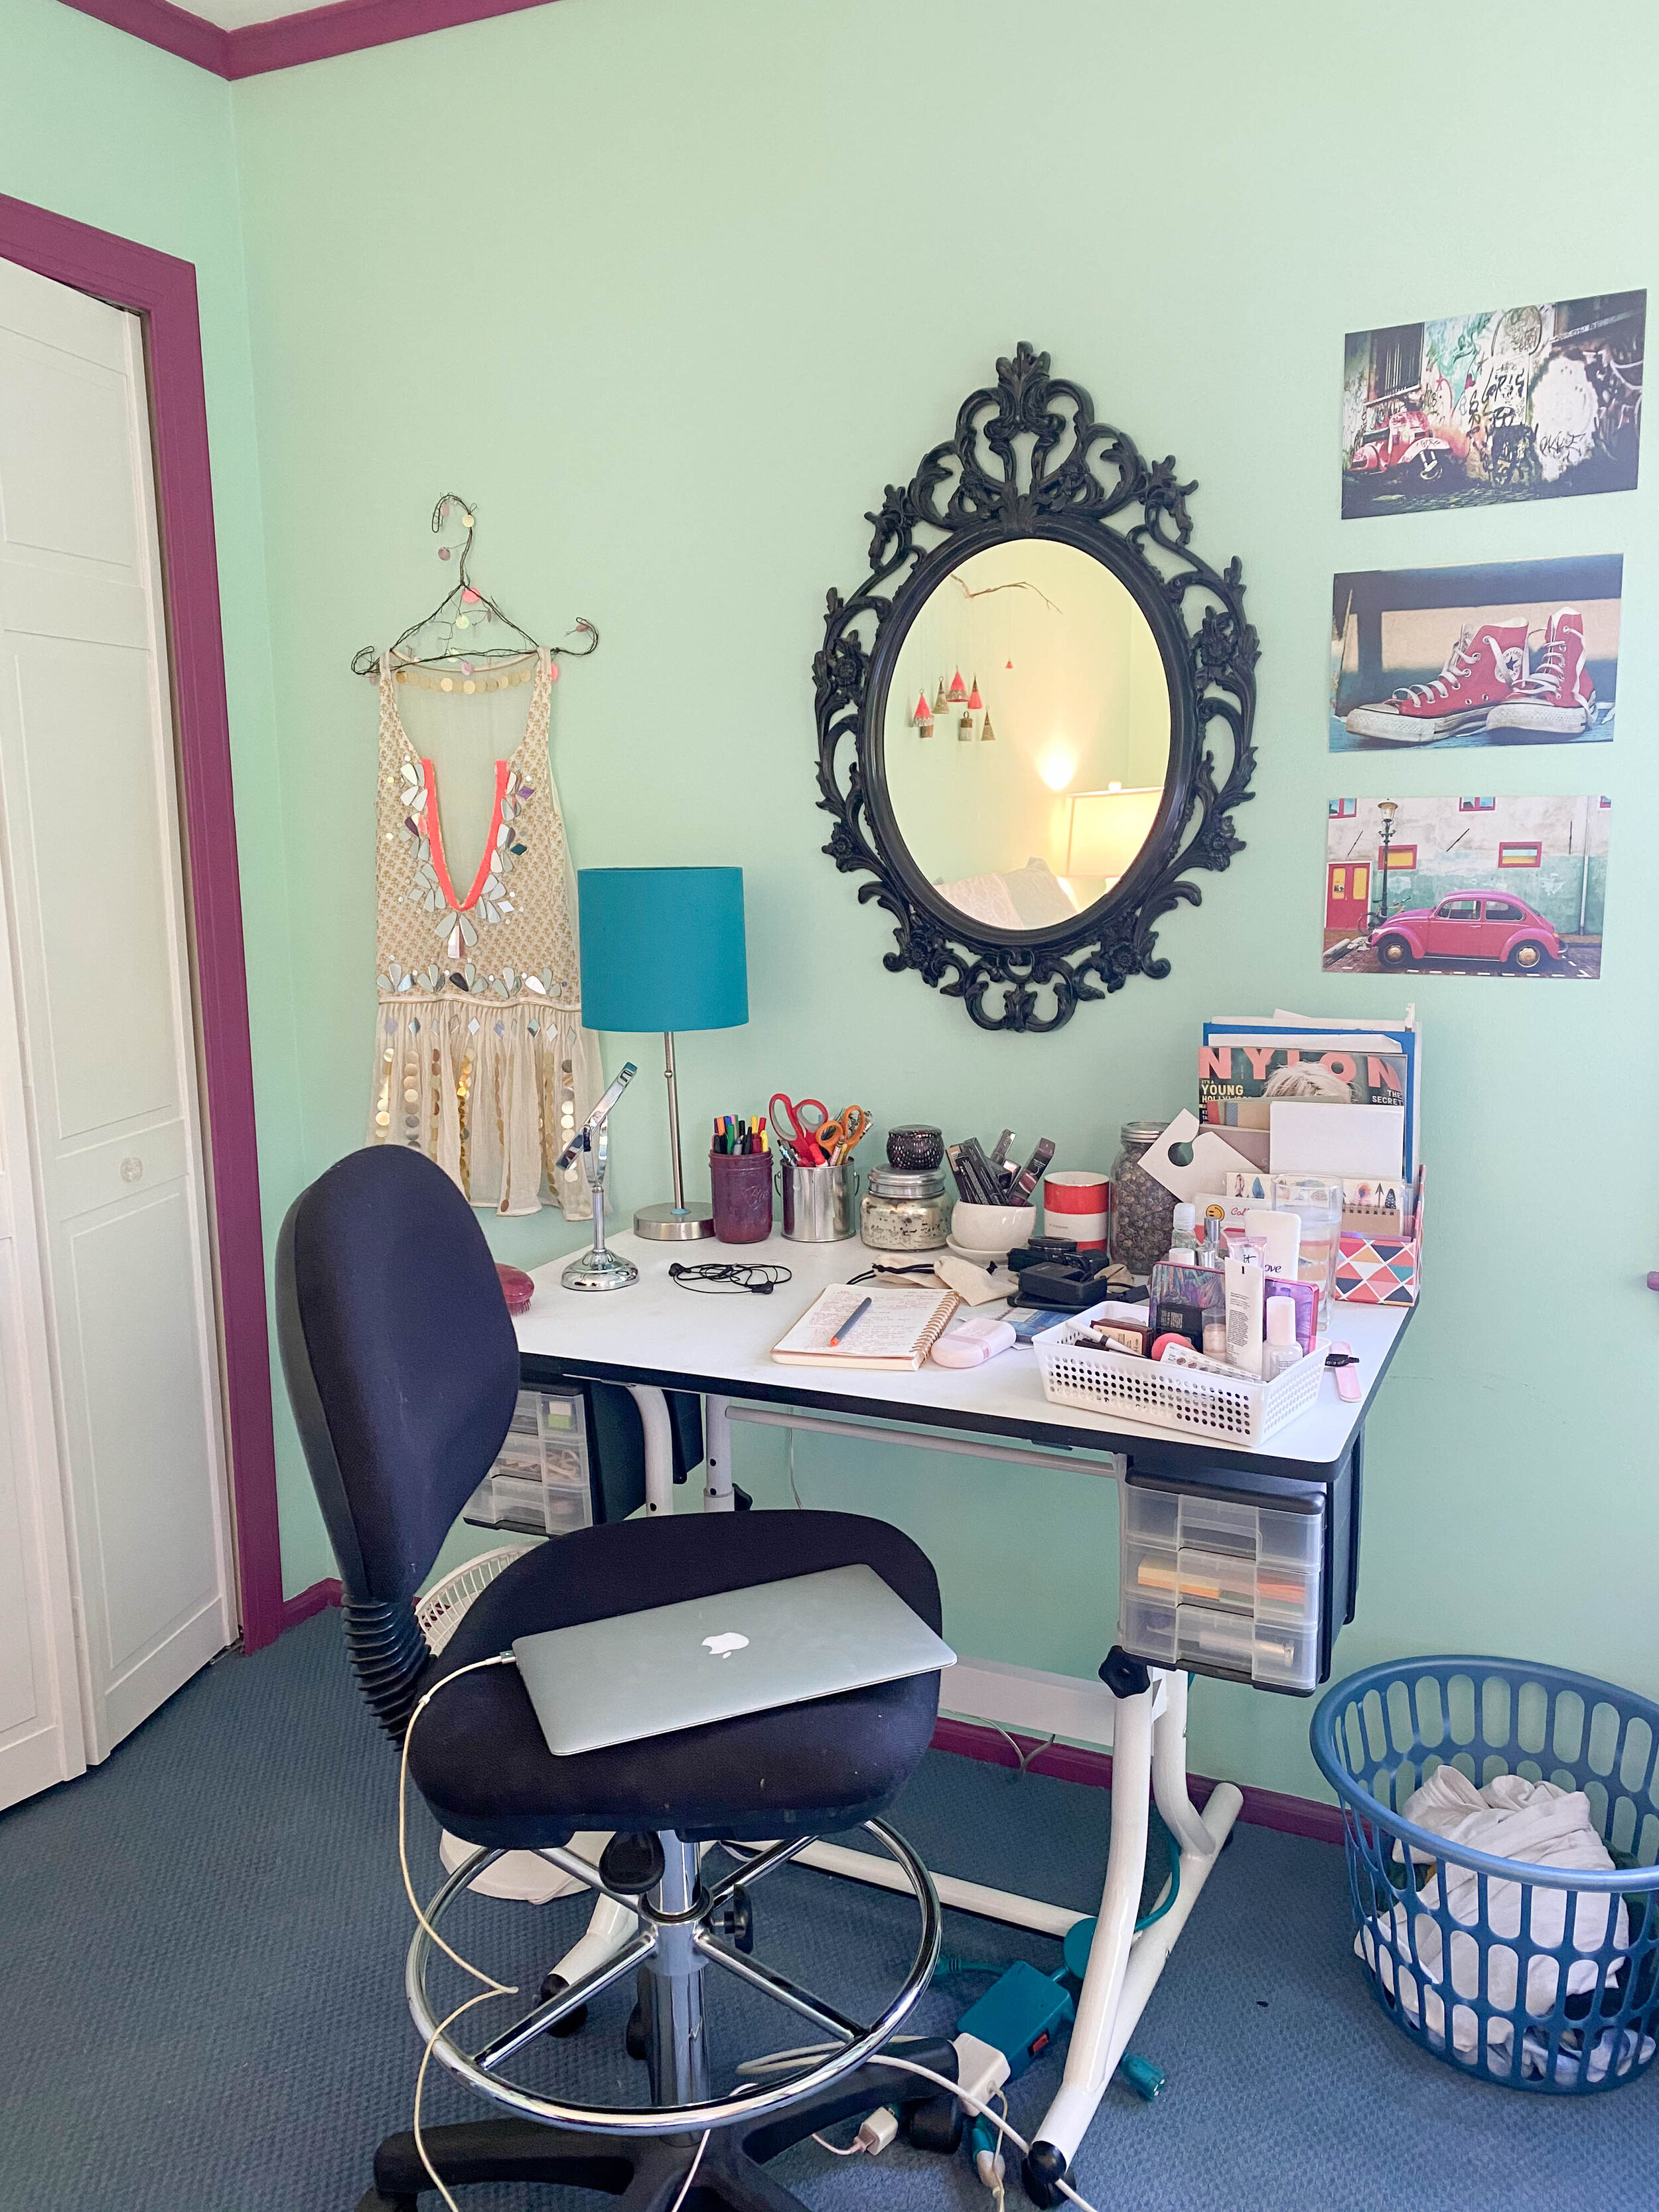
It also didn’t occur to me that my job that constantly requires creating content would be so tricky to do outside of my NYC apartment where I had a filming background I was happy with, lighting mastered, not to mention all of my clothes and beauty products to change up my look between videos instead of one Glossier pink pouch’s worth of stuff. And if you’re reading this and thinking “how bad could the room there really be?” the answer is turquoise and bright purple bad. My teenage self thought it was cool though, so here we are.
So what’s a 20-something gal who low-key moved back home during a pandemic to do when her mom shuts down plan A? Create plan B. I’ve been following Tezza on Instagram for as long as I can remember and when she launched her collage kits I thought they were genius but I didn’t think I had a use for them in my apartment. So when I saw on her stories that two of the kits were getting re-stocked I figured I should go for it and share my Tezza collage kit review with you all.
Before & After
Which kit did I choose?
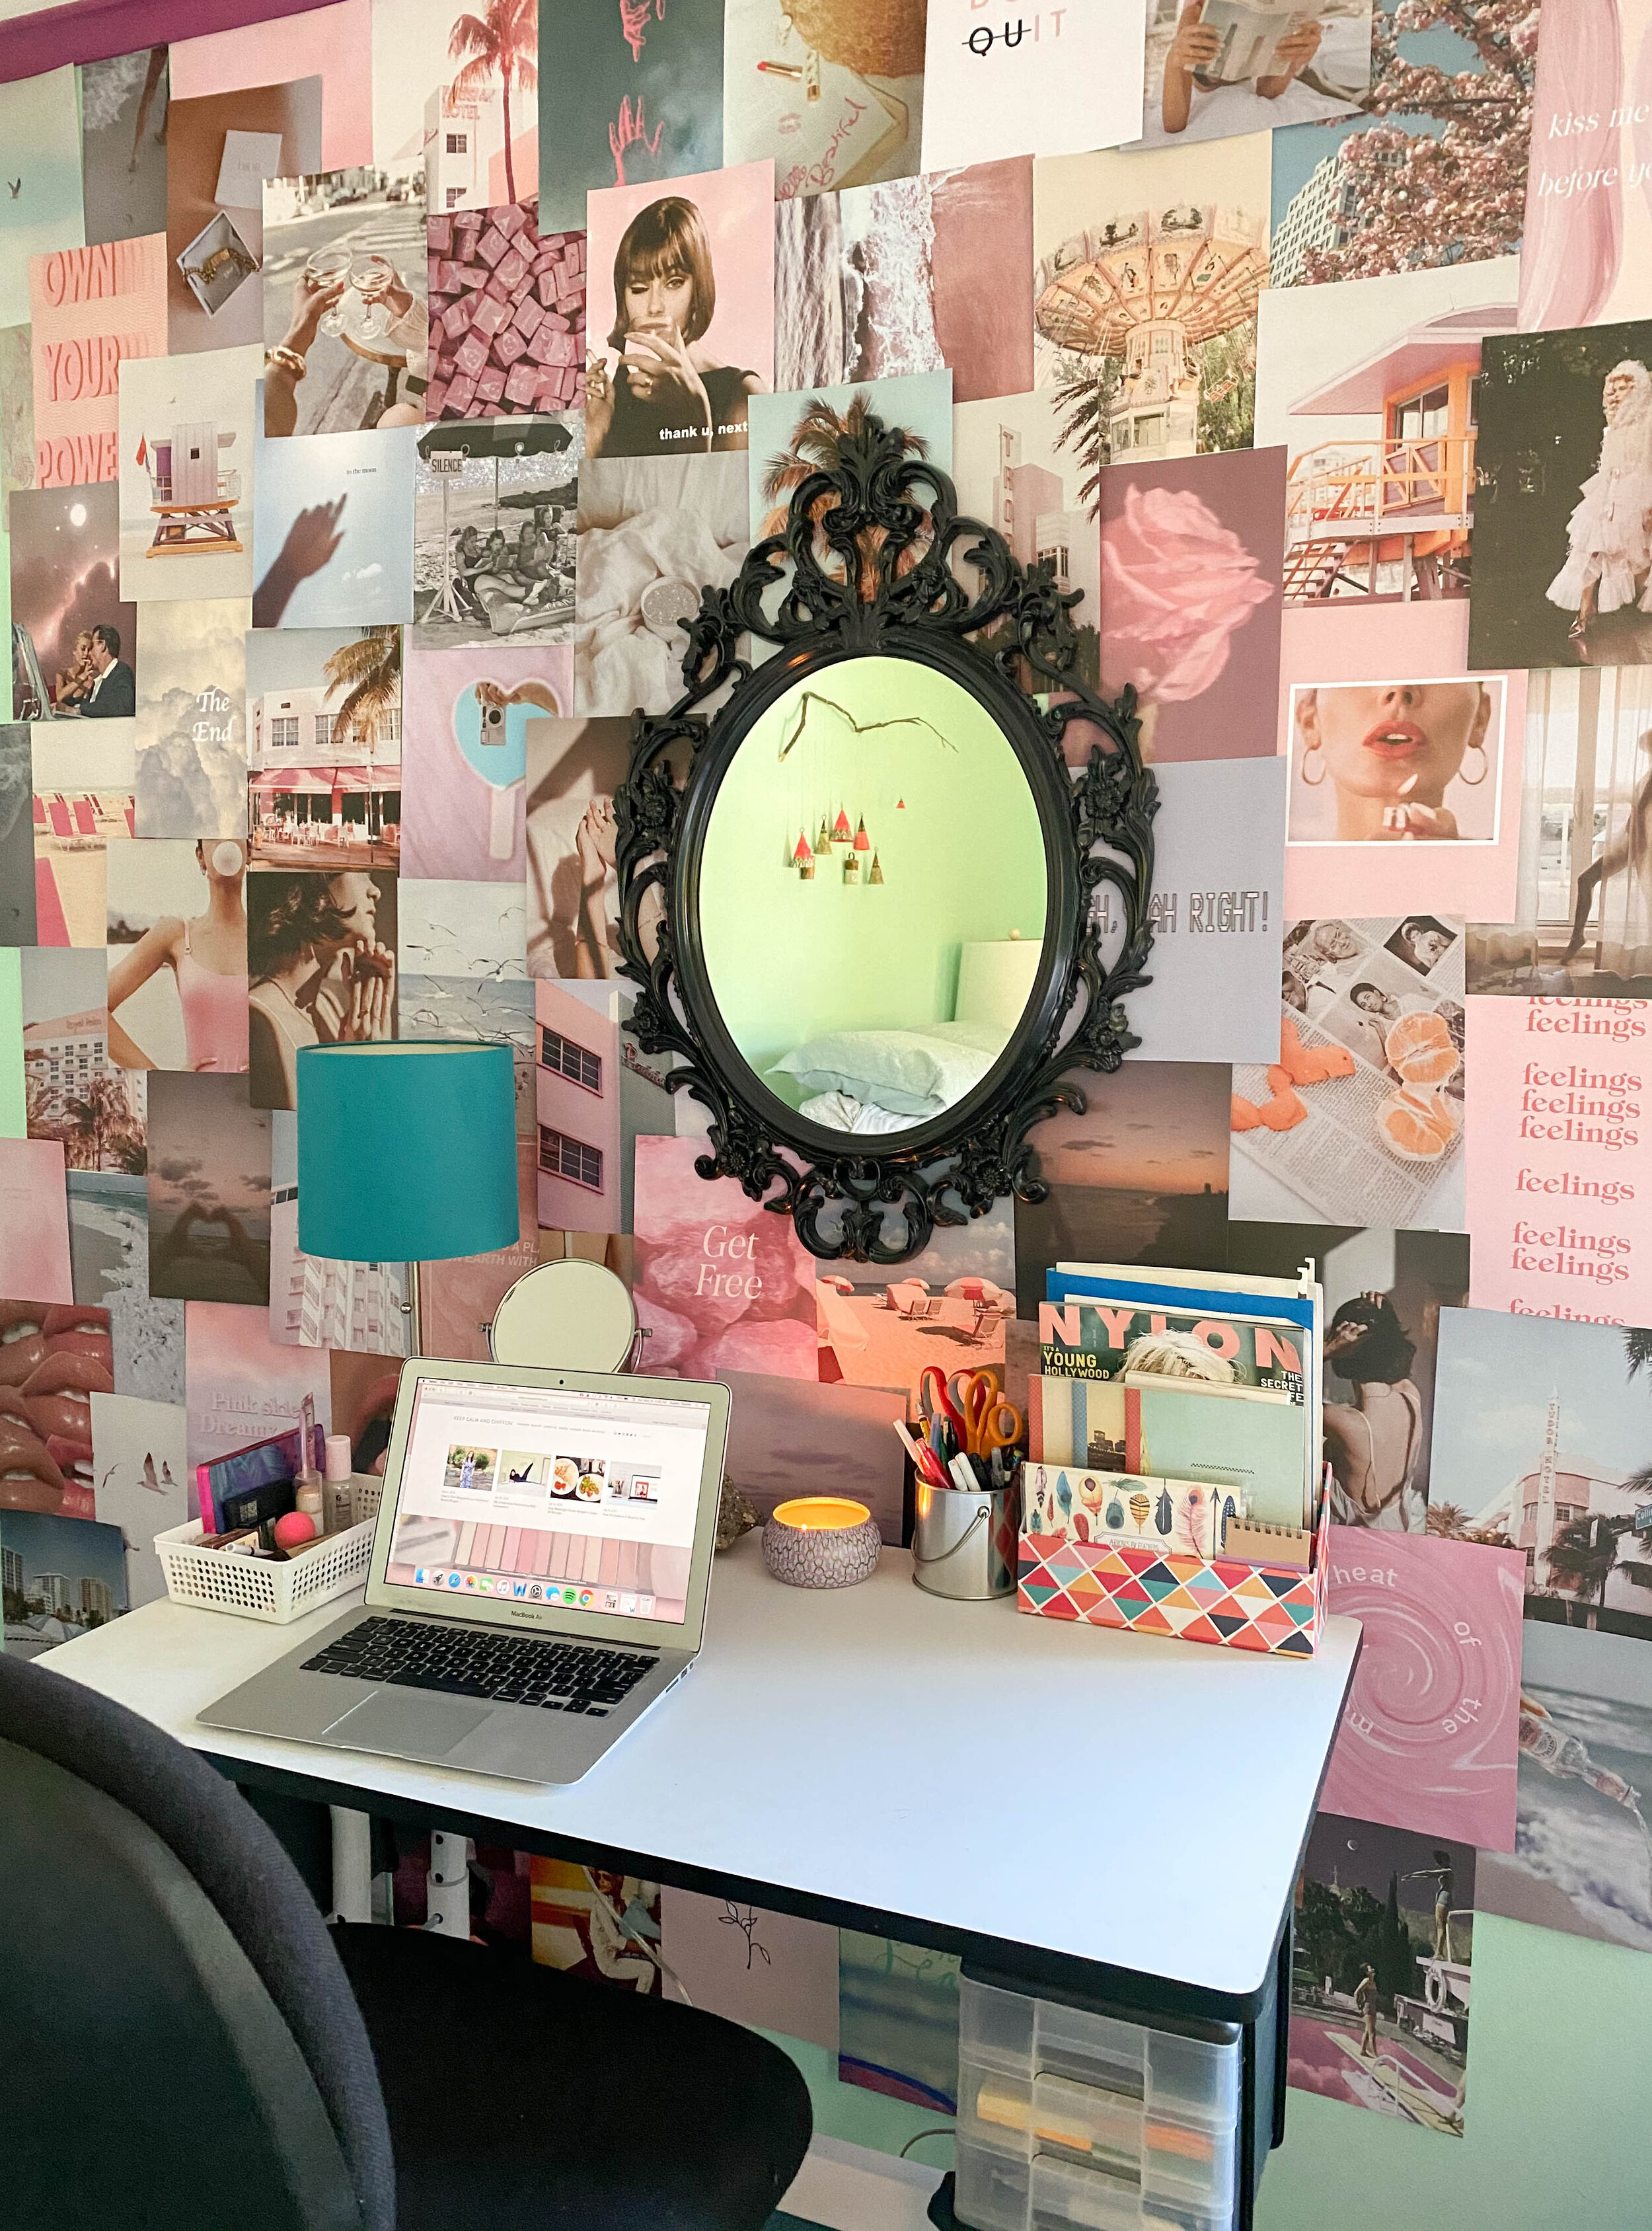
I went for the Dream Kit, which is the latest one she came out with solely because those were my favorite images that I thought would look the best in my room. As I was looking at the others on the website though, I realized that it was actually a half kit meaning that this one had 75 images instead of the usual 150. It was also half the price—the kits are usually $89 whereas the half kit was $49—which was a good thing for me so I decided to just go for it and see how far I got. It was definitely enough to cover most of one wall of my bedroom. The Tezza dream kit pictures are totally stunning, from photos of Miami Beach to a vintage carousel. I was able to use a few images from an old Free People catalogue with similar paper and colors to fill in the bottom where I was missing images.
Where did I put it?
I was debating putting it behind my bed as lots of the photos on the By Tezza Instagram feed seem to indicate people do but I didn’t want to constantly worry about leaning my pillow back against the wall and messing up the collage and I was really looking to create a background that I could film in front of. So I decided to put it above my desk and make an accent wall (the wall farthest from the door when you enter the room) that could also double as a new backdrop for filming.
What is the quality like?
I thought it was pretty great. The cardstock is strong and the images were gorgeous. The photos are a matte material, not shiny at all which is great for Instagram photos.
How long did it take me to put up?
It probably took me about two hours in total. When I got the kit I sorted the images into groups (darker images, images with quotes on them, images with lots of pink) so that I could rotate through the piles a bit as I put the images up to create dimension but most of them were pretty varied so I’m not convinced this was a necessary step.
What did I use to hang it?
Painter’s tape! And no, masking tape is not the same as painter’s tape, apparently. You can easily order some on Amazon or check your local hardware store to get some. They recommend not using tape image to image but taping directly to the wall. I like that I can remove it at any time without damaging the wall. Put tape in the top left and right corners, I tried putting it in just the middle and the sides curled a tiny bit for me and that way it will lay flat.
Why would I spend $50 on this when I could just use magazines to collage a wall?
Totally fair question and I think it’s just a matter of personal preference. I wanted a defined color scheme and matte pages as opposed to glossy magazine pages because I didn’t want my ring light to reflect on the pages in a weird way on camera when I need to film. If you’re not planning on photographing your space might, regular magazine pages might be fine. They’re definitely flimsier though so if you want to do this above your bed, definitely keep that in mind. It was worth it to me to spend $50 on something I knew would look good and last for a while.
Overall I’m happy with my Pinterest desk setup! I hope you found the Tezza dream kit review helpful. Would you buy one?
yours,
Austen